Tuesday, November 5, 2024
DIY Wooden Key Holder: Never Lose Your Keys Again
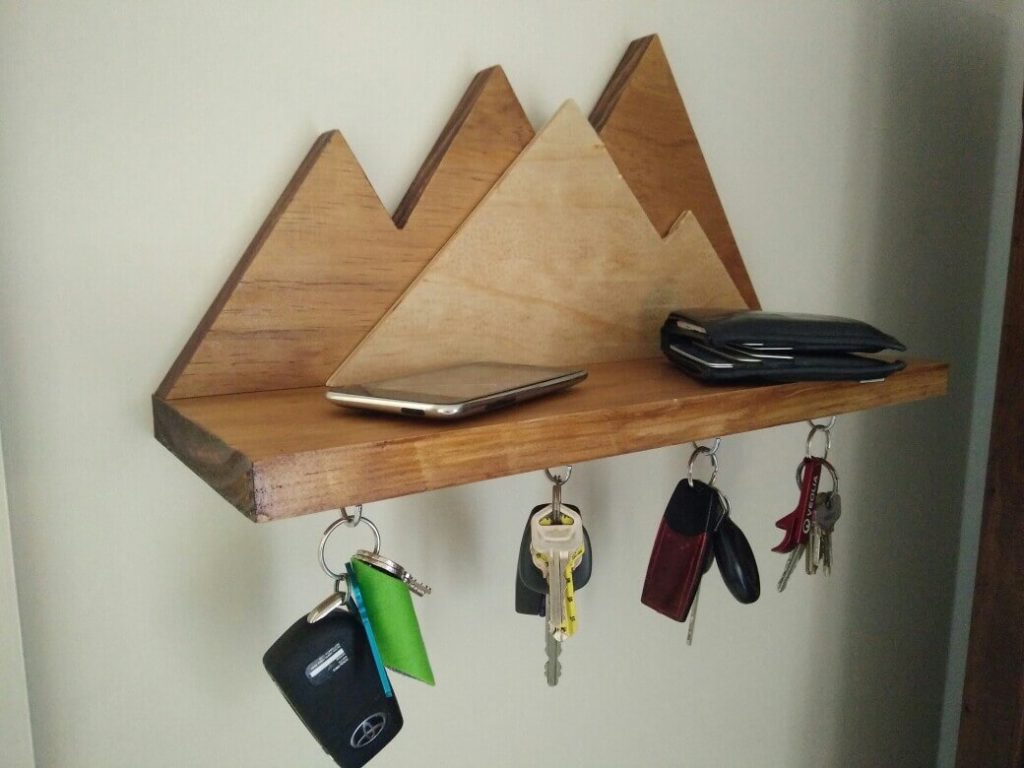

Tired of frantically searching for your keys every morning? A stylish and functional key holder can be the solution! This DIY project lets you personalize your entryway while keeping your keys organized.
Materials:
Wood board: Choose a size and shape you like. You can use reclaimed wood, a cutting board, or even a piece of plywood.
Wooden dowels: Select a size and number based on how many keys you need to hang.
Wood glue: A strong, waterproof adhesive.
Wood stain or paint: To give your key holder your desired look.
Sandpaper: Various grits for smoothing the wood.
Screws: For attaching the dowels to the board.
Drill with drill bits: For drilling pilot holes for the screws.
Measuring tape, pencil, and saw: For cutting the dowels to size and marking your board.
Optional: Hooks, hangers, or other decorative elements.
Instructions:
1. Prepare the wood: Sand your board thoroughly with different grits of sandpaper to achieve a smooth surface. If using reclaimed wood, ensure it’s clean and free from debris.
2. Cut the dowels: Measure and cut your wooden dowels to the desired length. You can use a saw or even a hand saw for this step.
3. Mark the placement: Use a pencil and measuring tape to mark the location of each dowel on the board. Ensure they are evenly spaced and allow ample room for your keys.
4. Drill pilot holes: Before attaching the dowels, drill pilot holes slightly smaller than the screws you will use. This prevents the wood from splitting.
5. Attach the dowels: Apply a generous amount of wood glue to the ends of the dowels and insert them into the marked positions on the board. Use screws to secure the dowels firmly.
6. Sand and finish: Once the glue is dry, sand the board again to ensure a smooth finish. Apply wood stain or paint, depending on your preference.
7. Add decorative elements: If desired, attach hooks, hangers, or other decorative elements to your key holder. You can use small knobs or even repurposed items for a unique look.
8. Hang your key holder: Mount your completed key holder to the wall using screws or nails.
Tips and Variations:
Get creative: Experiment with different shapes, sizes, and wood types to create a unique key holder.
Add a storage compartment: Use a small box or a shelf attached to the back of the board for storing other small items like mail or keys.
Customize with your initials: Use a wood burning tool to add your initials or a personalized message.
Use a different mounting method: Instead of screws, you can use Command Strips or adhesive hooks for a removable option.
Upcycle: Use an old frame, a piece of driftwood, or a repurposed object for a more rustic and eco-friendly project.
Now you have a beautiful and functional key holder that will keep your keys organized and within reach!
No comments:
Post a Comment